Black Chrome Plating: How Is It Done
Black chrome, with its deep, glossy shine and tough durability, is a favorite in both decorative and protective applications. From car rims to high-end watches, it always boosts a product’s vibe. This guide dives into the nuts and bolts of making black chrome, covering the core steps of electroplating and PVD coating. Whether you’re looking to nail the tech details or streamline production, this info will help you churn out top-notch black chrome.
Process Overview
Black chrome is a slick, durable surface treatment, popular since the 1960s for decoration and protection. Picture metal with a deep, glossy black, like flashy car rims or tough aerospace parts. Originally, electroplating made black chrome using chromic acid solutions and current to deposit a chrome coating. But traditional electroplating uses hexavalent chromium, and its waste is hard to handle, not eco-friendly.
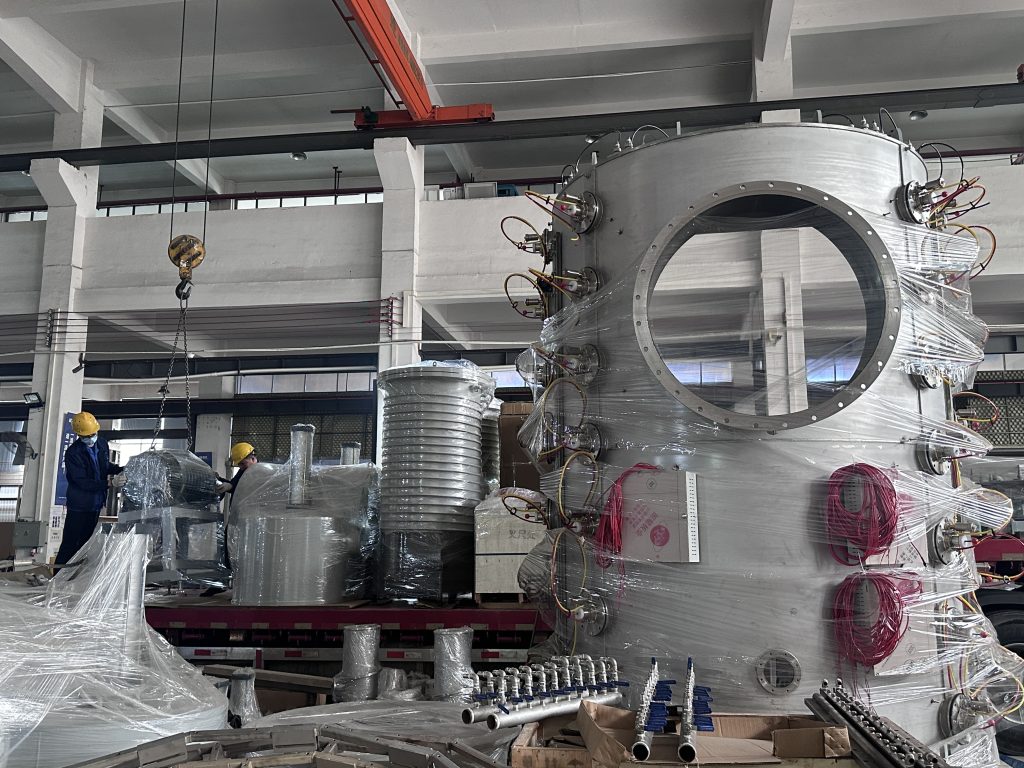
Now, PVD coating is the modern choice. In a vacuum technology setup, PVD uses chromium or titanium alloy sputtering targets. Through arc evaporation or magnetron sputtering, metal vapors coat the surface, forming a thin, hard black chrome layer. PVD is greener, with hardness over Hv1500, outlasting electroplating in wear resistance. From motorcycle chroming to medical tools or knives, black chrome shines. Next, we’ll break down the black chrome manufacturing process.
Surface Preparation
1. Ultrasonic Cleaning
- Equipment and Solution: Use an ultrasonic cleaner, 40-60 kHz frequency, 200-500W power. Choose an alkaline cleaning agent, pH 9-11, 5-10% concentration, heated to 50-60°C. Works for most metal substrates like stainless steel and aluminum.
- Process: Submerge substrate in cleaning solution for 5-10 minutes to remove grease, dust, and oxides, especially in complex areas like threaded holes. Rinse with deionized water 2-3 times, then blow dry or wipe with a lint-free cloth.
- Note: Ensure no oily sheen or water spots remain. Poor cleaning can cause coating defects like spots or peeling.
2. Polishing
- Tools and Materials: Use a high-speed polishing wheel, 1500-3000 RPM, with alumina or diamond compound, 1-5 μm grit size.
- Steps: Rough polish to remove scratches, then fine polish for a mirror finish, taking 5-15 minutes. Surface roughness should reach Ra 0.05-0.1 μm.
- Substrate Notes: Stainless steel needs multiple polishing steps. Aluminum requires gentle handling to avoid overheating. Inadequate polishing can make black chrome coating flaws more visible, hurting coating quality.
3. Plasma Pre-Treatment
- Setup: In a PVD chamber, vacuum to 10⁻³ Torr, introduce argon gas at 10-20 sccm, apply 200-400V bias, and 100-300W power.
- Function: Plasma bombards the substrate, boosting surface energy to 40-50 mN/m, improving black chrome coating adhesion by 20-30%.
- Note: Keep temperature below 150°C. Insufficient activation may cause black chrome coating to peel during adhesion tests.
4. Masking
- Materials: Use high-temperature tape, rated for 200°C, or custom metal shields for complex parts. Silicone plugs protect threaded holes.
- Process: After cleaning, apply tape or shields, extending 1-2 mm beyond edges. Inspect under strong light to ensure no gaps, preventing black chrome coating leaks.
- Removal: After coating, slowly remove tape and wipe masked areas with ethanol to clean residual adhesive.
5. Substrate Compatibility and Testing
- Stainless Steel: Corrosion-resistant, ideal for deep black chrome finish, but requires thorough polishing and plasma activation.
- Aluminum Alloy: Lightweight but prone to oxidation. Use light polishing and a quick acid wash, 5% sulfuric acid for 10 seconds, to avoid surface damage.
- Copper Alloy: Polishes well but discolors fast. Clean and coat quickly to prevent oxidation affecting black chrome coating chrome finish.
- Testing: Check surface energy with a contact angle tester, aiming for over 40 mN/m. Test-coat small substrate samples to ensure black chrome coating shows no peeling or color variation in coating uniformity.
Electroplating Process
1. Preparing the Solution
- Mix the solution: Use 250-300 g/L chromic acid, 2.5-3 g/L sulfuric acid, and plating additives per manufacturer instructions. Trivalent chromium is greener than hexavalent, cutting down on plating waste management issues.
- Control temperature: Keep it at 110-130°F (43-54°C). Too hot causes misting, too cold slows deposition.
- Stir evenly: Use mechanical stirring or a bubble pump to keep the solution uniform, avoiding color issues in the black chrome coating uniformity.
2. Pre-Plating Preparation
- Electrolytic cleaning: Soak the substrate in alkaline cleaning solution (pH 10-12) with low current (10-20 A/ft²). Clean for 1-2 minutes to remove grease and oxide films.
- Acid activation: Dip the substrate in 5-10% sulfuric acid for 10-30 seconds to neutralize alkaline residue and activate the surface. Steel needs 30 seconds, aluminum 15.
- Dry: Rinse with deionized water, wipe with a lint-free cloth to avoid water spots affecting the black chrome coating surface gloss.
3. Electrodeposition
- Set up equipment: Hang the substrate on a plating rack as the cathode, connect to a DC power supply. Use a lead-tin alloy anode. Ensure the substrate is fully submerged and connections are secure to avoid current breaks.
- Adjust current: Set current density to 150-200 A/ft² (16-22 A/dm²), plate for 10-20 minutes to reach 0.5-2 μm thickness. For complex parts, use 120-150 A/ft² and extend to 15-25 minutes.
- Monitor process: Check every 2-3 minutes to ensure the black chrome has a deep black color with no bubbles in the chrome plating.
4. Plating Control & Troubleshooting
- Fine-tune: Track current and time, log process parameters. Keep solution pH at 2.0-3.0, add chromic acid or additives as needed.
- Color issues: Grayish tint means the electroplating solution is old. Replace it or add more additives.
- Peeling: Poor cleaning or high current. Re-clean and lower current to 120 A/ft².
- Low gloss: Filter or replace the solution to get a mirror-like decorative coating with black chrome.

PVD Process
1. Creating a Vacuum Environment
- Setup: Pump the PVD machine to 10⁻⁵ Torr. Check the vacuum pump and seals.
- Flush: Use nitrogen to flush the chamber. This removes moisture and oxygen for a clean black chrome coating.
- Note: Low vacuum can cause oxides in the black chrome, making it gray or reducing adhesion strength.
2. Selecting the Sputtering Targets
- Material: Use a high-purity chromium target (99.9%) for deep black. Titanium nitride target gives gray-black or rainbow PVD color. Watch cases often use magnetron sputtering, while wheel hubs use arc evaporation.
- Prep: Lightly polish the target. Set distance at 10-15 cm for an even PVD finish.
3. Pre-Treating the Substrate
- Setup: In the PVD chamber, apply a bias of 200-300V. Set argon flow to 10-20 sccm. Treat for 5-10 minutes.
- Purpose: This boosts adhesion strength of the black chrome, especially on stainless steel or aluminum.
4. Gas Adjustment
- Gas: Use nitrogen at 15-25 sccm for deep black, argon at 10-15 sccm for gray-black.
- Pressure: Maintain chamber pressure at 0.5-2 mTorr with a mass flow controller.
5. Deposition and Cooling
- Deposition: Arc evaporation (50-100A, 0.3-5μm, for mass production) or magnetron sputtering (RF sputtering, smooth for precision parts). Bias at 100-200V, deposition rate 0.1-0.5 nm/s.
- Cooling: Cool to 50°C with argon at 5 sccm to protect the black chrome coating surface.
- Note: Inspect chamber for deposits to avoid contaminating the next batch of black chrome.
Final Processing
1. Precision Cleaning
- Cleaning Medium: Use deionized water with conductivity below 5 μS/cm. Keep temperature at 20-30°C to avoid thermal stress damaging the black chrome coating.
- Process: Soak parts in deionized water tank, gently agitate for 1-2 minutes, or rinse with low-pressure nozzle under 2 bar. Avoid high-pressure water jets to prevent scratching the chrome coating’s glossy PVD finish.
- Drying: Wipe surface with lint-free microfiber cloth or dry in clean airflow with HEPA 13 filtration. Ensure no water spots or fiber residue remain.
- Note: Inspect parts for oil or water marks. If found, wipe with 1% neutral cleaner and rinse again.
2. Low-Temperature Curing
- Setup: Use convection oven set to 190-210°F (88-99°C). Do not exceed 250°F (121°C) to prevent black chrome coating discoloration or substrate deformation.
- Process: Place cleaned and dried parts in oven with even spacing for heat circulation. Bake for 25-35 minutes, depending on part thickness (25 minutes for thin parts, 35 for thick ones).
- Mechanism: Low-temperature curing strengthens chemical bonds between chrome atoms and substrate interface, boosting adhesion strength by 10-15%.
- PVD Exception: PVD black chrome coating, due to its dense vacuum-deposited structure, may skip curing. For aluminum alloy substrates, a short 15-minute bake is recommended to relieve stress.
3. Polishing and Protection
- Polishing: Use soft polishing wheel at 1000-1500 RPM with non-abrasive wax-based compound. Lightly buff surface for 1-2 minutes. Avoid over-polishing.
- Protective Coating: Apply or dip parts in a nanoscale transparent protective coating (0.1-0.5 μm thick), like silicone or fluorinated coating, for fingerprint resistance and corrosion protection.
- Notes: Before polishing, inspect surface with 10x magnifying glass to ensure no micro-scratches. Protective coating must be uniform, with no bubbles or sagging after drying.
4. Quality Inspection
- Visual Check: Use 20x magnifying glass or microscope to inspect black chrome coating surface. Ensure deep black color is uniform, with no spots, bubbles, or pinholes. Gloss test at 60° angle should measure 85-95 gloss units.
- Adhesion Test: Conduct cross-hatch adhesion test with 1 mm spaced 6×6 grid. Apply 3M tape and pull; coating detachment must be under 5%. If detachment is high, review pre-treatment or curing steps.
- Performance Test: Measure black chrome coating hardness with Vickers tester (HV 0.1), targeting Hv1200-1500. Abrasion test (Taber abrader, CS-10 wheel, 500g load) must withstand over 1000 cycles for industrial chrome coating machine parts.
- Documentation: Record inspection data (color, hardness, adhesion) and archive to optimize process parameters for future black chrome coating batches.

Tips
Black chrome plating needs care. Electroplating and PVD each have their tricks. Here’s advice to boost efficiency and quality:
- Track process parameters: To get good black chrome, note vacuum technology levels, arc source current, or plating solution mix. Use a spreadsheet, like saving a recipe, to avoid trial and error.
- Maintain equipment: Check PVD machine vacuum pumps and arc source regularly. Clean deposits, change pump oil. Keep electroplating tanks clean to avoid impurities affecting coating quality. Good equipment ensures stable black chrome.
- Test before mass production: Don’t rush to big batches. First, do test coating on a few samples. Adjust PVD gas ratio or plating time to ensure black chrome color and adhesion strength are right, then scale up to avoid risks.

